
VoCore as smart sensor
Published on January 18, 2015
VoCore as smart sensor
Some days ago I received my VoCore, this device is amazing it’s a full embedded Linux device with OpenWrt, WiFi and Ethernet on board and many I/O (i2c, GPIO, SPI, UART, ..). Its main strengths are size and WiFi on board. About size look at the following picture.

For a maker a device like this is awesome, combine connectivity and power in a so small size can open infinite possibilities but the first that comes to mind is smart sensors.
Smart sensor is a generic term, my own interpretation is about a device can acquire some physical data, elaborate it and communicate over the internet. What I’d like to present in this post is a simple use of VoCore as smart sensor.
Configuring OpenWrt
Before starting we need to configure OS, I chose to use Python for implementing the smart sensor logic.
VoCore is shipped with a release of OpenWrt doesn’t carry Python, so here the step to install it, I skip basic VoCore setup because can be found on VoCore site. Next steps assumes You are able to connect via ssh to VoCore and it has a internet connection enabled.
OpenWrt uses a package manager called opkg, like many others it uses a list of repositories urls where look for packages. These urls are defined in /etc/opkg.conf and in default configuration isn’t present the repository for python.
So first step is to add a new repository url, add the following line to the end of /etc/opkg.conf
src/gz cheese_packages http://downloads.openwrt.org/snapshots/trunk/ramips/packages/packages
After this we need to update opkg cache with following command
root@OpenWrt:~# opkg update
And finally we are able to install python
root@OpenWrt:~# opkg install python
Ok, less is done 🙂
Making the sensor
Now it’s time to work on hardware, what I’d like to make is a simple intrusion detection system that sends a push notification when someone get in the room. To send push notification I’ll use Pushetta, a service I made specifically to solve this task.
A PIR sensor is used to detect movements, this kind of sensor use infrared radiation to detect temperature changes in a specific range.

PIR sensors are cheap and really simple to interface with a microcontroller, there are only three pins. Two are VCC and GND and the last one is the OUTPUT.
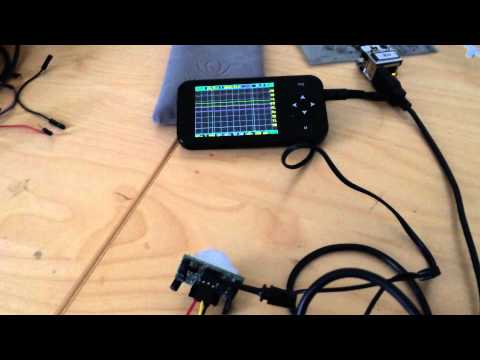
In the following video I show how it works, I’m using a portable oscilloscope connected to the PIR sensor. As You can see when something move in sensor’s range output level goes high (+5V) and return low after a while.
What we want to do is read PIR output and send a push notification when it changes to high.
Sending notifications with Pushetta
To send notification we’ll use a web service I made called Pushetta, this is made of a web site and two Apps (one for iOS and one for Android).
First we need to register on Pushetta web site, it’s free and it’s a mandatory step to be able to send notifications.

After signup process we need the API key, this is the key used to call Pushetta service and send notification, it’ll be used in code we’ll write after.

Last step is to create a channel. Channel is something like a topic used to send notifications. User want to receive notifications have to subscribe channel interested in, using Pushetta Apps. More informations about how Pushetta works can be found on www.pushetta.com.

Now we are ready for the last step: connect PIR sensor to VoCore and write a few lines of Python code to handle all the logic.

In the picture there is the schematic used for our experiment. Connecting PIR sensor is really simple, I used GPIO0 as input in the VoCore module. Whit this circuit GPIO0 is put to low when PIR signal is up and vice versa. Must be taken into account that PIR sensor require +5V as power source, on VoCore can be used USB+ pin.
Before writing full Python program is better to test that everything is working as expected with a simple shell script, first step is login on VoCore via ssh and change directory to GPIO0 sys filesystem as follow.
root@OpenWrt:~# cd /sys/class/gpio/
root@OpenWrt:/sys/class/gpio# ls
export      gpio13      gpio18      gpio21      gpio24      gpio7       gpiochip0
gpio0       gpio14      gpio19      gpio22      gpio25      gpio8       gpiochip22
gpio12      gpio17      gpio20      gpio23      gpio26      gpio9       unexport
If we see an output like the one above we are in the right place and next step is to change dir to gpio0.
root@OpenWrt:/sys/class/gpio# cd gpio0/
root@OpenWrt:/sys/devices/10000000.palmbus/10000600.gpio/gpio/gpio0# ls
active_low  device      direction   edge        subsystem   uevent      value
Two files are important for us, direction is the first one. We need to put the string “in” inside to this to set GPIO0 in input mode (we need to read from it). The other one is value, value is 0 when GPIO0 is low and 1 when high.
Coming to the script we can use the one below, it simply read value every second.
while  [ 1 ]
do
  cat value
  sleep 1
done
Executing it console shows something like:
1
0
0
0
0
0
0
1
1
1
0
0
1
0 mean PIR is sensing motion, else nothing is moving around it, all works fine!
Becoming a smart sensor
Now the code, I found an already made wrapper for interacting with GPIO made by Stefan Wendler and to not reinvent the wheel I use this, is called DigitalIO and I put it on github with all the code of this article.
This wrapper makes really simple to read GPIO status, with the following five line of code we can print on console the GPIO status read every half second (something like we made with shell script).
pin = DigitalIO.get_input(GPIO0)
while True:
    read = pin.state()
    print "GPIO0 state = " + str(read)
    time.sleep(0.5)
Last piece of code we need is the one used to send the notifications, we make a function to solve this task later used in final code.
def sendNotification(token, channel, message):
    data = {
        "body" : message,
        "message_type" : "text/plain"
    }

    req = urllib2.Request('http://api.pushetta.com/api/pushes/{0}/'.format(channel))
    req.add_header('Content-Type', 'application/json')
    req.add_header('Authorization', 'Token {0}'.format(token))

    response = urllib2.urlopen(req, json.dumps(data))
With all piece in our hands it’s time to assemble all together and make real our smart sensor.
pin = DigitalIO.get_input(GPIO0)
while True:
    read = pin.state()
    if read == 0:
       print "Something move"
       # NOTE: API_KEY and MYCHANNEL name must be updated with values
       #       created in pushetta web site in the previous steps
       sendNotification("API_KEY", "MYCHANNEL", "ALARM!!! Something move")
    else:
       print "No motion"
    time.sleep(0.5)
Isn’t a “production ready” software but a good starting point to make the real one. A small problem with this code is it send a push notification for every motion it detects. This can generate many notifications and Pushetta protects for this problem blocking requests if these are too frequent. This can be simply addressed recording last notification sent and send another one only some time has passed, I leave this as an exercise for the reader.
If you like it, share it!